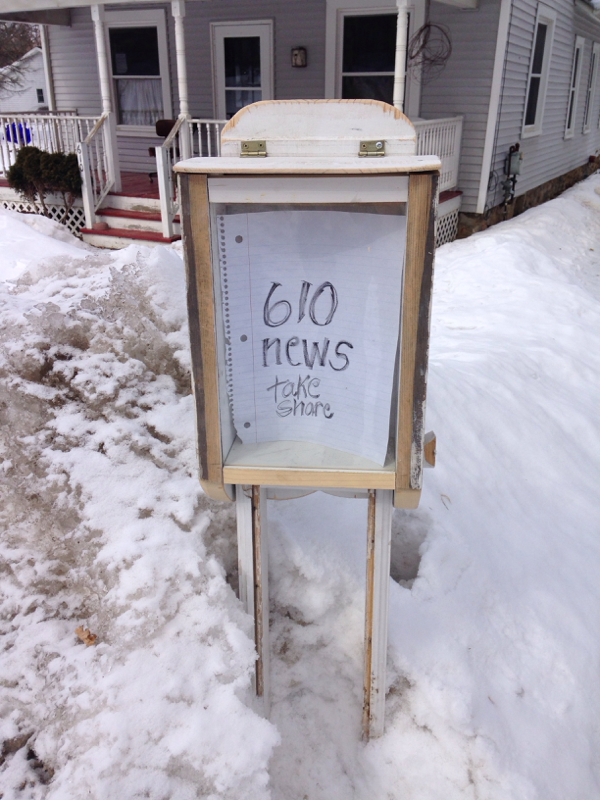
I thought i was going to solder them but the planing required a piece at a time put into place because of odd lengths and uneven walls and several turns and angles to deal with. I found some doweling i had picked up at an estate sale and used it as inserts between sections , then drilling holes and set screws to secure joins.
I reshaped 1 1/4 " new copper pipe brackets to mount to wall, securing to studs. These keep the railing close to the wall as the stair is pretty narrow. At the bottom ( or beginning) of stairs i actually carved wood joints as pipe fittings were not the correct angle. The stair way is not a straight shot, nor is it standard. It's a bit small to grip tightly and there are joints , however i feel much more secure knowing it's available for balance for others using the stairs. I think in a few months there will be a lovely patina again on the copper visually connecting it and it's components.
I still aspire to solder so i can collect and construct Fun stuff using copper pipe, it too will be a thing of history as plumbing relys on plastics. This sweet little window shelf is suspended on the wood 2x4 separating my huge kitchen windows. This is a ( only) south window . I didn't want to goop up the view and so it Dawned on me to put a small shelf that appeared to be floating, this is how it was done. Also i needed to be able to remove storm windows ( on inside) and operate windows during the summer months.
Then i sat the top on, arranged spread of supports, lined up and screwed from top down into supports, 1 screw each. It needs to be painted white. Very happy with results. When i need to remove storms it will be easy to remove screws, shelf top, swing support out of way. I 'd been thinking about a shelf in this window. Love it! Wood brackets are easy to make with the right tools and are lovely. These kinds of projects i can assist you with at 610 studio, come learn to cobble, design, construct creative treasures and heirloom gifts. Invest in yourself, make it.
I hope i won't have any issues with the smoke detector having a shelf below it. If so i'll remove top shelf. The shelving has wider shelves on bottom 4 shelves, 9". The upper 4 are 7" wide. New wood , some of it from left over projects, some from reclaimed resources. Air nailer came in handy. I used shoe molding to support shelves. All tied into studs. See next pic about bottom.
Putting art and collectables on the shelves. I jumped up and down on floor to see if anything might topple. Hanging it from the wall made stable surfaces, plus they appear level. The book case i had there earlier was un level and made the living room appear crooked. Well it is! As all get out, but ... Now it looks straighter. Magic
I built a shelf above the stove from a bed frame board, note how top end is wider? I cur the bed board in half and used the fancy ends to create wider plate shelves on upper level. Then i used new but left over 1x boards from baseboard project to build the rest. Painted it and stocked it. I need to find one more squat 1/2 jar to fill upper shelf with tea and beverage stock. I had squirreled away spice jars, dug them out, cleaned , transferred spices and labeled them . Pretty! It is securely attached to wall. Edge next to fridge has a strip of wood attached to shelf and then screwed into wall. The other side is attached to door frame.
|
M Shaw
|
MShaw-FolkArt.com |
|